Creating an animated clip of a character running on water can be a real challenge. Many animators struggle with the physics and fluid dynamics to make it look realistic. But don’t worry, I’ve got some practical tips and expert insights to help you out.
You might be thinking, How do I even start? Well, let’s dive right in. This guide will walk you through the key techniques and tools you need.
We’ll cover everything from the basics to the more advanced stuff.
sonic running on water gif is a great example of what we’re aiming for. It’s all about making that scene visually stunning and engaging. Trust me, by the end of this, you’ll have a solid grasp on how to create something amazing.
So, are you ready to get started, and let’s do this.
Understanding the Basics of Animation
Let’s get one thing straight: animation can be a real headache. You think it’s all about drawing some cute characters and making them move, but it’s so much more than that.
Timing, for example. It’s like trying to catch a bus that’s always either too fast or too slow. Get it wrong, and your animation looks jerky and unnatural.
Spacing is another pain point. You spend hours tweaking the distance between frames, only to find out it still doesn’t look right.
And don’t even get me started on squash-and-stretch. It’s supposed to add life and energy to your animations, but it can easily make things look cartoonish in a bad way. (Ever seen a character stretch so far they look like they’re made of rubber?
Yeah, not good.)
Now, let’s talk tools. Adobe Animate, Blender, Toon Boom Harmony—there are so many options out there. Each one has its quirks and learning curves.
It’s like choosing between different types of pasta; you have to figure out which one works best for your sauce.
But here’s the kicker: no matter how fancy the software, it won’t save you if you skip the pre-production steps. Storyboarding and planning your sequence before you start animating is crucial. Skipping this step is like trying to build a house without blueprints.
You might get something standing, but it won’t be pretty.
Storyboarding helps you visualize the flow of your animation. It’s where you can spot potential issues and make changes before you invest hours into the actual animation. Trust me, it saves a lot of headaches down the line.
So, before you dive into the deep end, take a moment to plan. It’ll make the whole process smoother and less frustrating. And who knows, maybe you’ll even feel like Sonic running on water.
Sonic running on water gif
In the end, it’s all about finding the right balance. Take your time, use the right tools, and plan ahead. Your animations will thank you.
Creating the Character
When it comes to designing a character for a running-on-water effect, keep it simple. Think about the visual appeal and practicality. You want something that looks cool but also makes sense in the context of the action.
Character Design
Start with a basic sketch, and focus on the silhouette. It should be recognizable and dynamic.
Consider the character’s outfit and accessories. They need to look like they can handle high-speed water runs without looking too bulky or unrealistic.
Modeling and Rigging
For 3D models, use software like Blender or Maya. Start with a base mesh and refine it. Keep the poly count in check; you don’t want to overcomplicate things.
For 2D, tools like Adobe Animate or Toon Boom are great.
Rigging is key. Set up the rig so the character can move smoothly. Pay attention to the joints, especially the legs and feet.
They need to be flexible enough to show the right amount of bend and flex as the character runs.
Texture and Shading
Add textures to give the character depth. Use a mix of rough and smooth materials. For shading, play with light and shadow to make the character pop.
This is where you can really bring the character to life.
Here’s a quick tip: Use a sonic running on water gif to get a feel for the movement. It can help you visualize how the character should look and move.
Remember, the goal is to create a character that looks good and moves well. Don’t overthink it. Just focus on making it work for the scene.
Animating the Character’s Movement
Keyframe Animation: How to use keyframes to create the running motion, focusing on natural and fluid movements. It’s all about making each step look like it’s part of a seamless flow.
Timing and Spacing: Tips for adjusting the timing and spacing to achieve a realistic running-on-water effect. You need to get the timing just right or it’ll look off. Too fast, and it looks like they’re skating.
Too slow, and it feels like wading through mud.
Secondary Actions: Adding small, subtle movements (e.g., hair, clothing) to enhance the realism. These little details can make a huge difference. A flick of the hair or a flutter of the cape can really bring the scene to life.
CAPS: Make sure to CAPS the key moments in the animation. This helps emphasize the impact and adds a dynamic feel to the movement.
PRO TIP: Pay attention to the character’s weight distribution. If they’re running on water, their center of gravity should shift naturally with each step.
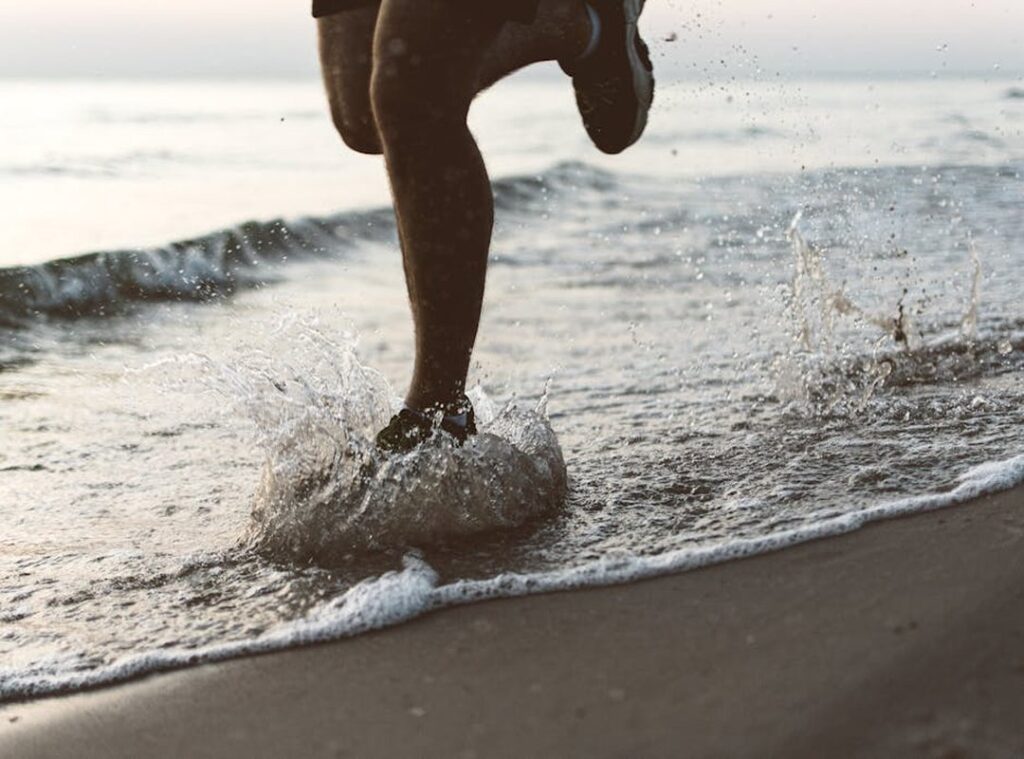
Here’s a great example of what I mean:

See how the character’s feet hit the water and the ripples spread out? That’s the kind of detail that makes the animation pop. Keep it simple, but don’t skimp on the small touches.
Simulating Water Dynamics
Water simulation is a big deal in game design. It can make or break the realism of a scene.
Particle systems are one way to go, and they’re great for creating splashes and ripples. But for more complex interactions, fluid simulation tools are the way to go.
These tools can simulate the flow and behavior of water in a more natural way.
Interaction with the Character
When a character moves through water, it should look real. Ripples and splashes add that extra layer of realism.
Think about Sonic running on water. Sonic running on water gif That’s the kind of interaction we’re aiming for. The water reacts to his every step, making the scene feel alive.
Reflections and Refractions
Adding reflections and refractions to the water enhances the visual quality. Reflections show what’s above the water, while refractions distort the view below.
These details might seem small, but they make a huge difference. They turn a simple water surface into a dynamic, believable environment.
By focusing on these techniques, you can create a more immersive and engaging experience for players. And who knows, maybe your next project will be the one that takes you from rags to riches inspiring jackpot success stories.
Adding Visual Effects and Policing the Scene
Visual effects can make or break a scene. I’ve seen too many projects where they just slap on some generic fog and call it a day. (Not on my watch, folks.)
Let’s talk about incorporating additional effects like mist, droplets, and light rays. These elements can add depth and realism to your scene. For example, a subtle mist can create a mysterious, ethereal vibe.
Droplets on a surface can show recent rain, adding a layer of storytelling.
| Effect | Purpose |
|---|---|
| Mist | Creates a mysterious, ethereal vibe |
| Droplets | Shows recent rain, adds storytelling |
| Light Rays | Enhances mood and atmosphere |
Now, let’s dive into lighting. Proper lighting is key to setting the right mood. Soft, diffused light can create a calm, serene atmosphere.
Harsh, directional light can add drama and tension. Experiment with different setups to see what works best for your scene.
Final touches are where the magic happens. Adjusting colors, adding filters, and fine-tuning the overall composition can transform a good scene into a great one. Don’t be afraid to play around with these elements until you get the look you want.
Remember, the goal is to enhance the scene, not overwhelm it. Keep it simple and focused. Trust me, less is often more in visual effects.
Exporting and Sharing Your Animation
Rendering your animation right is key. High quality and smooth playback are what you want. Use the best settings your software offers.
It’s worth it.
Most people skip this, but pre-rendering checks can save you a lot of headaches. Run a test render. It’s like a dress rehearsal for your final show.
Sharing your work, and you’ve got options. Social media, YouTube, and animation platforms are all great.
Each has its perks.
YouTube is huge. It’s where most people go to watch animations. But if you’re into niche stuff, specialized platforms might be better.
They have a more focused audience.
Don’t forget about social media, and it’s quick and easy. Plus, it’s a great way to get instant feedback.
Pro tip: Always export in multiple formats, and different platforms have different requirements. Saves you from scrambling at the last minute.
And there you have it. Simple steps to get your animation out there. No need to overcomplicate things.
Just focus on making your work shine.
Bringing Your Animated Clip to Life
To create an animated clip of a character running on water, start by sketching the key poses. Focus on the fluidity of motion and the interaction between the character’s feet and the water. Timing and spacing are crucial for conveying the right sense of movement and weight.
sonic running on water gif can serve as a great reference for dynamic action and style. Pay close attention to how the water ripples and splashes with each step. This adds realism and enhances the visual appeal.
Practice is key. The more you refine your animation, the smoother and more natural it will look. Patience is also essential; don’t rush the process.
Attention to detail makes all the difference. Small touches, like the character’s hair or clothing moving with the motion, can elevate the quality of your animation.
Experiment with different styles and techniques, and each project is a learning opportunity. Share your creations with the community to get feedback and inspire others.